How to create custom endpoints for WordPress REST API without code

In this post you will learn how to build a few types of custom endpoints that you may need on your WordPress site by using the Rest Routes Pro plugin

By Adriano Ferreira

The WordPress REST API


Since WordPress 4.7 the REST API is a thing on WordPress. After it got fully integrated into WordPress core, developers got one more powerful tool for building their sites.


That opened a big door of opportunities in the WordPress ecosystem. One of them was the WordPress Headless term, which in short is basically an option to use only the backend of the WordPress for administrating the site data (post, terms, users, etc) and serve this data through REST endpoints. Those endpoints can then be consumed by any kind of frontend application (React web site, mobile apps, etc), as long as it works with REST.

WordPress Custom REST Endpoints


WordPress by default exposes a number of default endpoints for some basic operations. However, understanding the power of the feature, it also provided a powerful API for building your own custom endpoints for any kind of purpose.


Building those custom endpoints requires some coding knowledge, though. That’s where Rest Routes comes in! The main idea of Rest Routes is to provide a very friendly interface in the WordPress admin for letting you build complex custom endpoints for your site.

Take a look below on this short video and see Rest Routes Pro in action:

Building Custom Endpoints for a Real Estate Site

 
This blog post will show you how easily is to create some complex custom endpoints without previous coding knowledge. For explaining that I’ve choose the Real Estate subject which is a very type of WordPress site. 


We are going to create a few custom endpoints that can help your Real Estate site to expose the properties, agents, and amenities that can be easily consumed by any type of client, it can be a React web site or maybe an Android app, it really doesn’t matter what the sky is the limit! (as long as the client can work with REST, of course)

Defining the Structure of the Site

 
This is something you will build in the way that you wish. I will provide a very simple structure just for showing you how to expose your data using Rest Routes Pro. This is the structure that I will use:
  • One custom post type for the Properties
  • One custom post type for the Agents
  • One custom taxonomy for the Property Amenities
  • One custom post field for storing the ID of the Agent to be connected with the Property
  • One custom post field for storing the Property Price
  • One custom post field for storing the Agent Contact

Then, we are going to create some custom endpoints:

  • acme/v1/properties
  • acme/v1/agents
  • acme/v1/property-amenities

Properties Custom Endpoint

 
This will be a custom endpoint for exposing the properties stored on your site. Also, we are going to provide 3 filters for better refining your results.
 
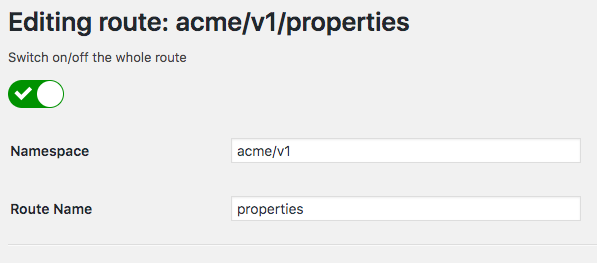
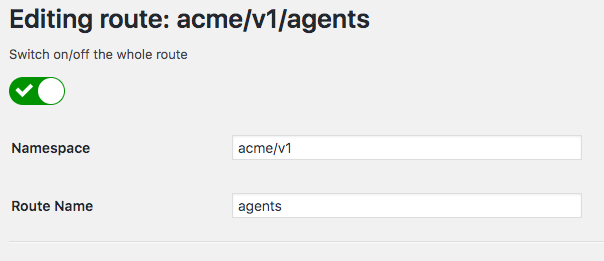
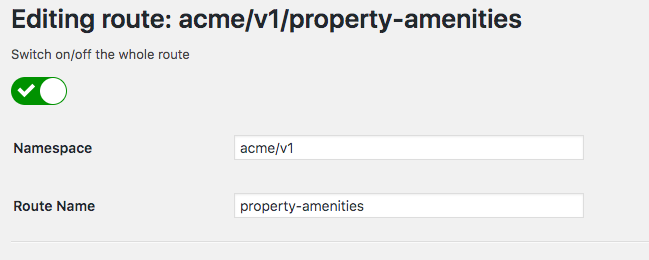
Add a new route and fill the basic settings accordingly:
 
 
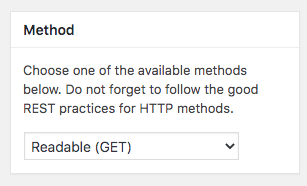
Since we are going to return posts we should use GET. Accordingly to REST, this method is the one indicated for such purpose. So, select the GET method:
 
 
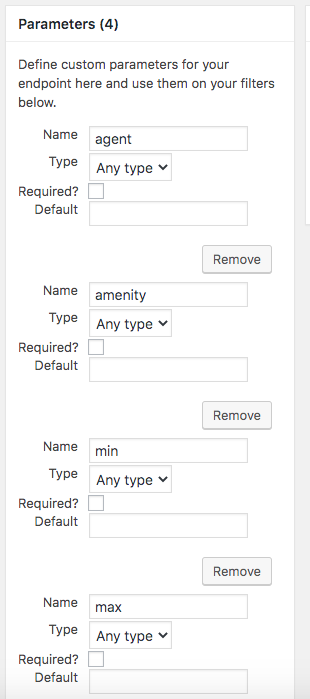
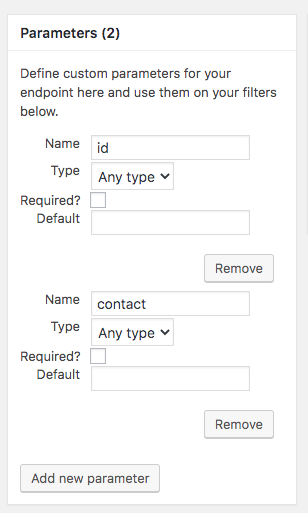
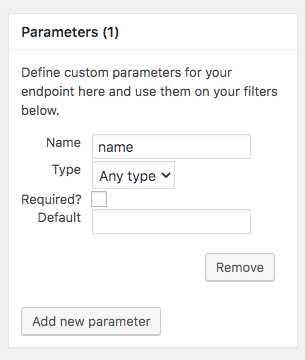
Let’s add some custom parameters that will let us refine our results. One parameter for the Agent, one for Property Amenities, another two for price comparison:
 
 
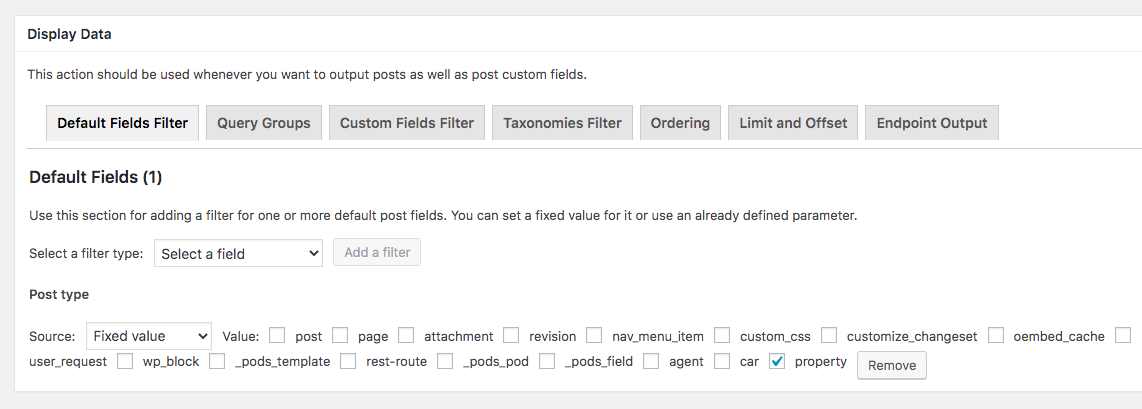
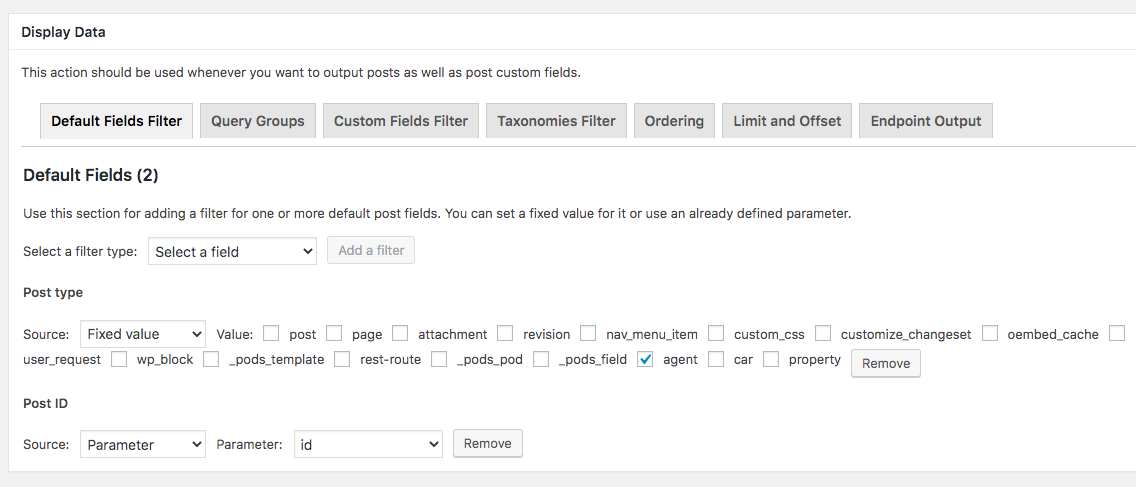
Add a filter for displaying only property custom posts:
 
 
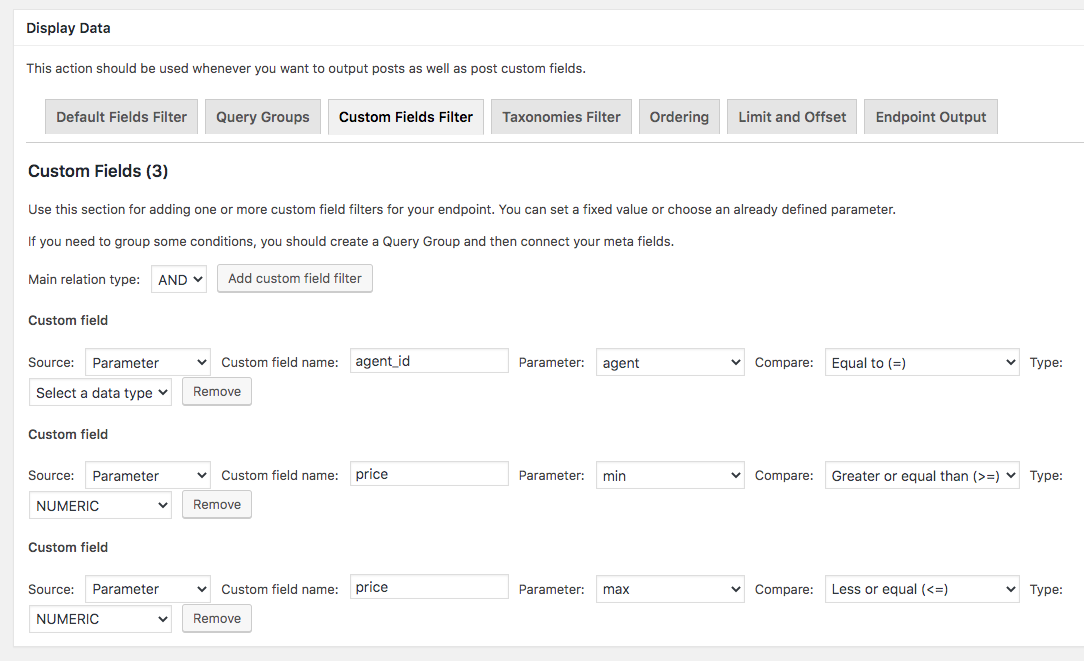
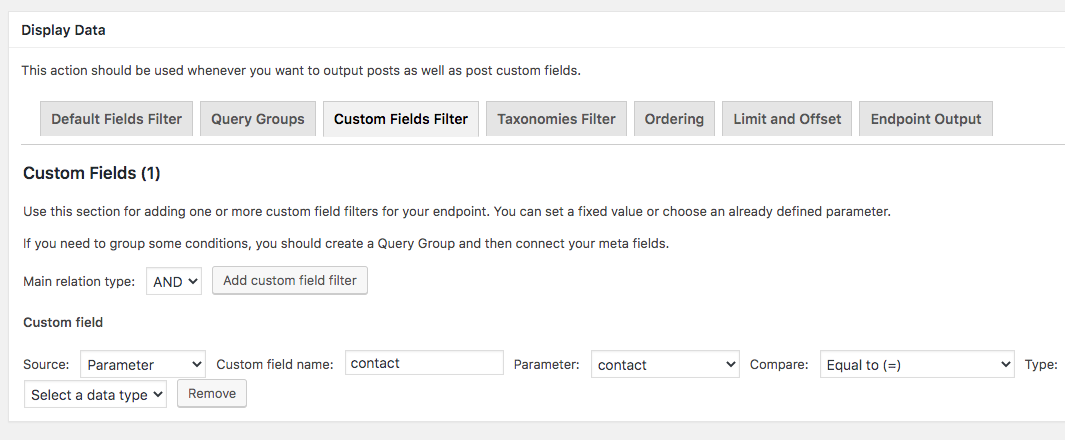
Add a filter for the agent and prices, these filters should be connected to the custom parameters we’ve created earlier:
 
 
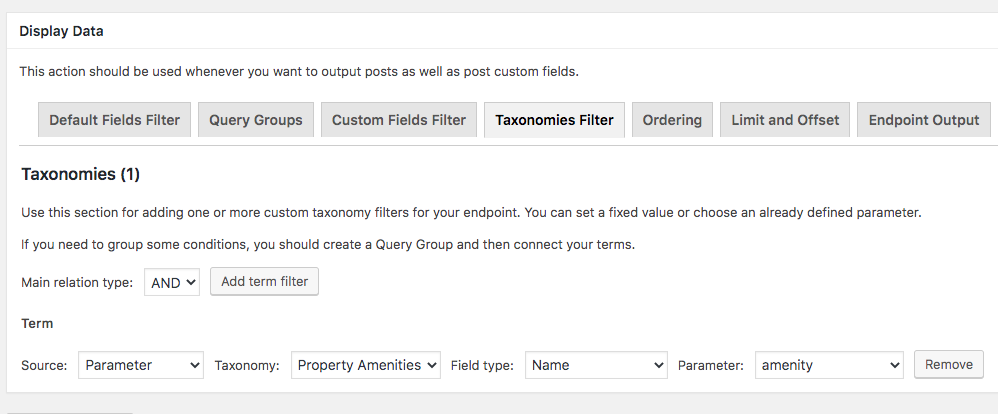
Add a filter for the custom taxonomy Property Amenity, this filter should be connected to the custom parameter we’ve created earlier:
 
 
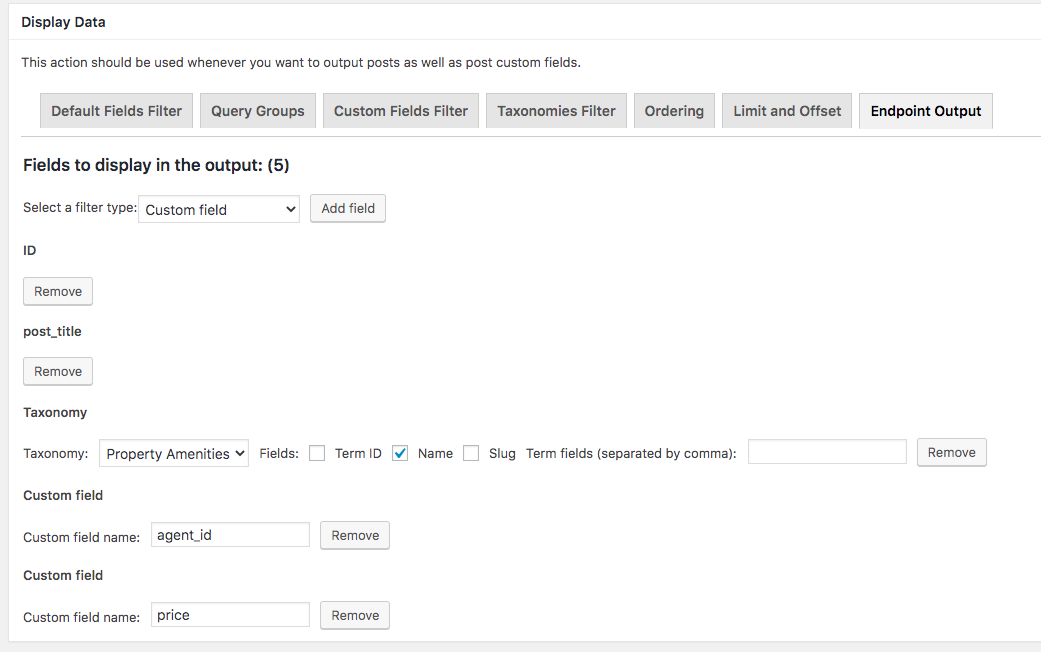
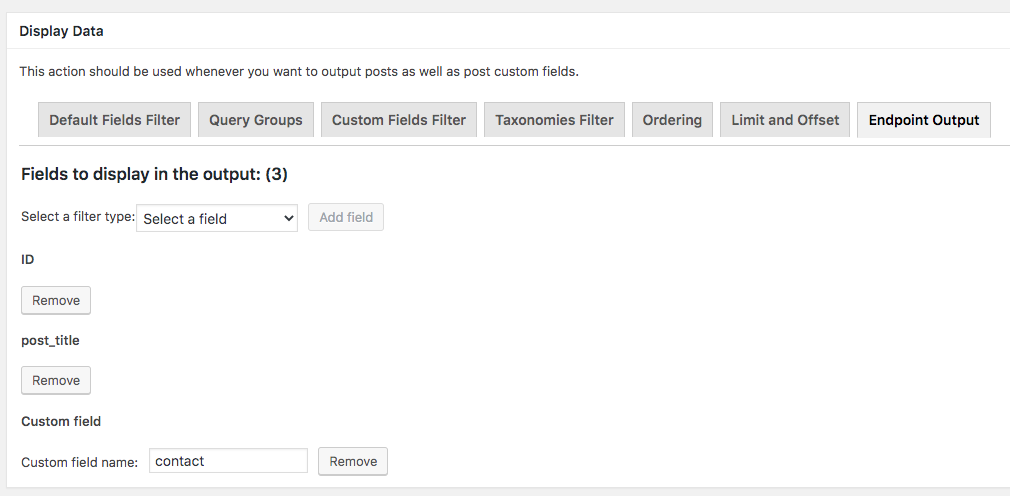
Let’s now define the output of the endpoint. We are going to expose a few fields: Property ID, Property Title, Agent ID, Property Amenities, and Prices:


Save and that’s it! Your custom endpoint is now available and ready to be consumed!


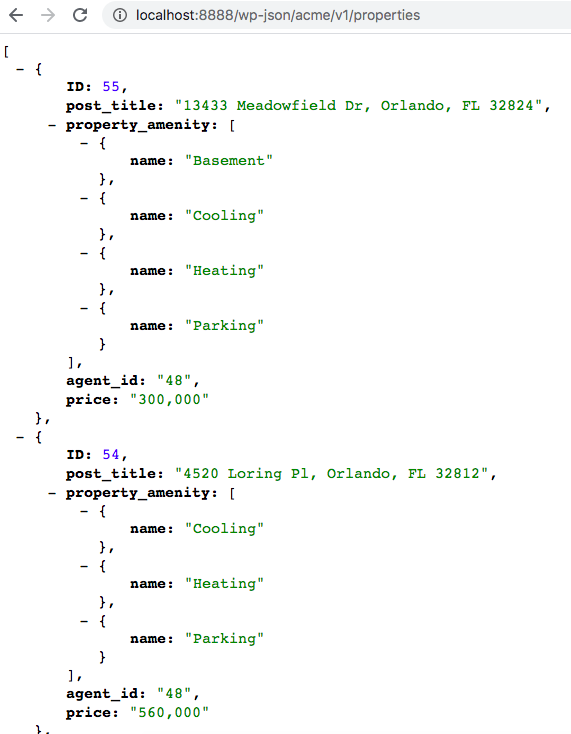
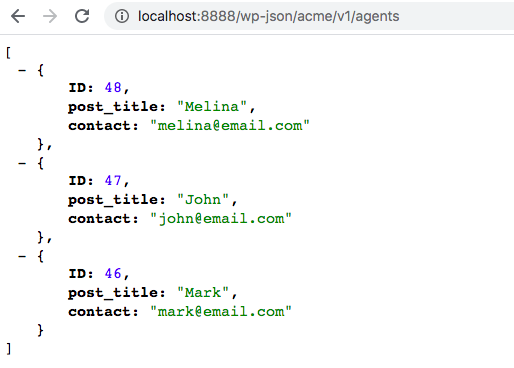
Let’s now test our custom route with a single endpoint created for the GET method. Navigate to wp-json/acme/v1/properties and if you can see all your properties exposing fields as you defined, congratulations, your custom endpoint is up and working.
 
 
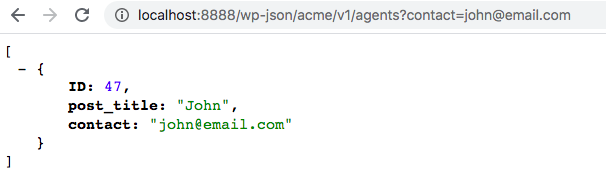
We’ve added two filters which are listening to the URL parameters, let’s check it out:
 
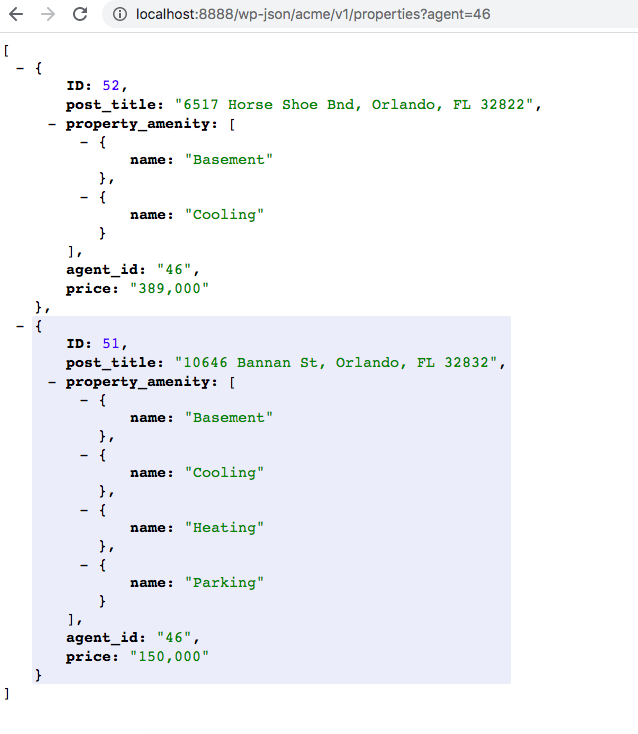
Navigate to wp-json/acme/v1/properties?agent=46
It should now show only properties of Agent 46.
 
 
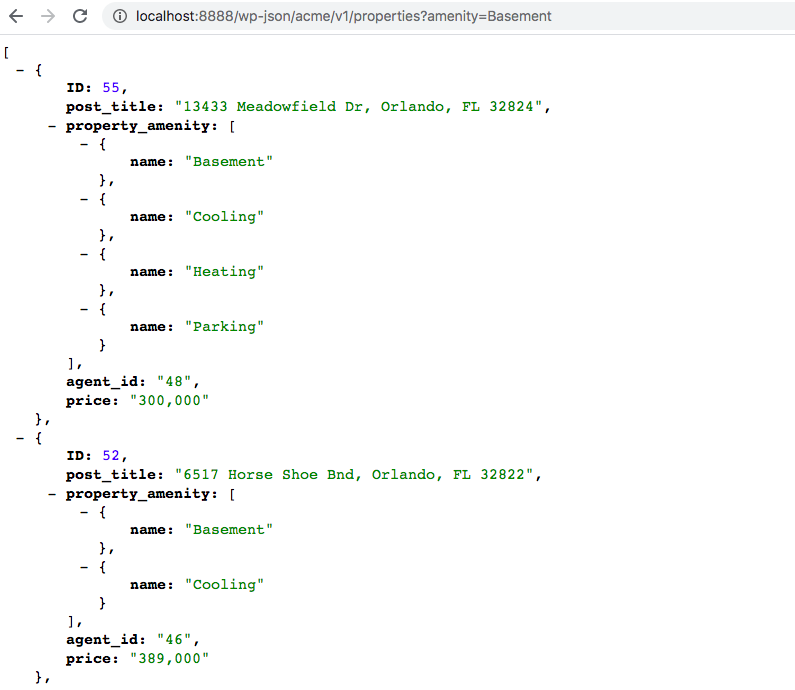
Navigate to wp-json/acme/v1/properties?amenity=Basement
It should now refine that even more, showing only properties that contain the Basement as a Property Amenity.
 
 
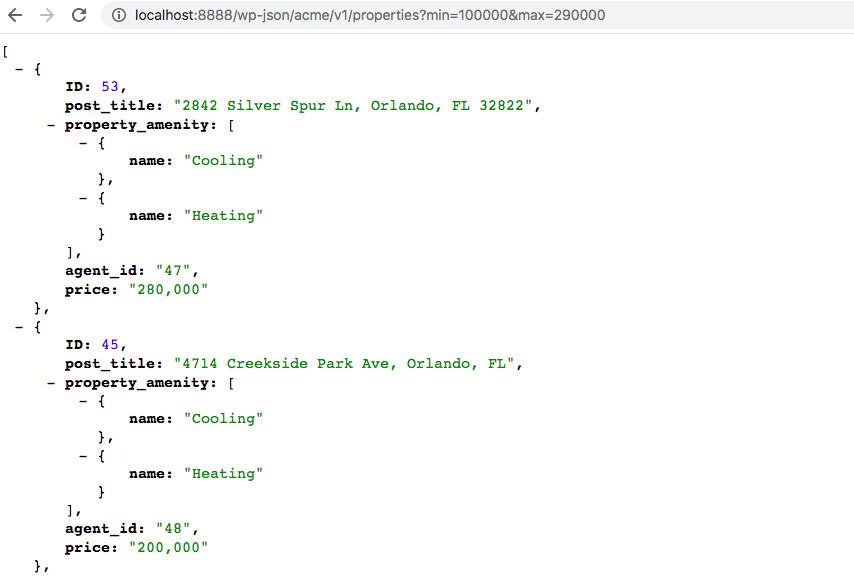
Navigate to wp-json/acme/v1/properties?min=100000&max=290000
It should now show only the properties with a price between 100,000 and 200,000.
 

Agents Custom Endpoint

 
Same as we did before for Property custom endpoint, let’s create a new route filling the basic settings as:
 
 
Select the GET method:
 
 
Add a parameter ID for filtering by Agent and a parameter contact for filtering by Agent contact:
 
 
Add a filter for showing only posts under custom post type agent and also a filter for the Agent ID custom parameter:
 
 
Add a filter by the custom field Contact for listening to the custom parameter we’ve created:
 
 
Let’s now define the output of the endpoint. It should expose: Agent ID, Agent Name, and Agent Contact:
 
 
Let’s test our custom endpoint now. Navigate to wp-json/acme/v1/agents
 
You should see all the agents stored on your site:
 
 
You can now use two filters for refining your results, let’s try them out.
 
Navigate to wp-json/acme/v1/agents?id=47
You should see only one Agent, the one with ID 47
 
 
Navigate to wp-json/acme/v1/agents?contact=john@email.com
You should see only one Agent again, the one with email john@email.com
 

Property Amenity Custom Endpoint 

 
Let’s create another route:
 
 
Select GET method:
 
 
Add a parameter for the amenity name:
 
 
Select the action for displaying taxonomies. Notice that the action of this custom endpoint is different than the other 3 above, this is because we want to display terms and not normal posts:
 
 
Add a filter for showing only terms from Property Amenity taxonomy and a filter for the term name, this one should listen to the custom parameter we’ve created:
 
 
In the output, we are going to expose: ID, name, and Count:
 
 
Let’s test our custom endpoint now, navigate to wp-json/acme/v1/property-amenities
You should see all the property amenities available
 
 
Let’s use our filter, navigate to wp-json/acme/v1/property-amenities?name=Cooling
You should see only one amenity now, the Cooling:
 

Conclusion


We’ve just created 3 custom endpoints for your WordPress site that will let you expose your Properties, Agents and Property Amenities. Each custom endpoint will display only the fields that you defined. Also, those endpoints comes with a few custom filters that will let you refine the results. 


This was just a basic tutorial showing you how easy is to create custom REST API endpoints for your WordPress sites without writing a single line of PHP code. There are many other features and possibilities you can do through the plugin and many new features are coming up soon.


Does this plugin sounds like a good fit for your site? Click here and start building awesome routes for your site now.

Join our 322,204 newsletter subscribers and get the latest news and articles sent straight to your inbox weekly


Rest Routes 5.5.0

Rest Routes 5.5.0 Insert custom URL parameters values on your Custom SQL Query endpoint type and much more… PRO PRICING By Adriano Ferreira New Custom

Read More »

Rest Routes 5.3.0

Rest Routes 5.3.0 Now you are able to perform authenticated requests through Basic Authentication. PRO PRICING By Adriano Ferreira Basic Authentication is not available!  

Read More »

Rest Routes 5.0

Rest Routes 5.0 Write Custom SQL Queries and make HTTP requests PRO PRICING By Adriano Ferreira We are pleased to announce the 5.0 release of

Read More »